Rainbow 6 Quick Tips
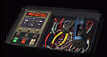
Equipment: Your best bet is to go with the Assault outfit because this guy is better with the guns and preforms all round in every other area. For greater speed choose the Recon guy but be warned the Recon guy usually dies from smaller wounds (ie: leg wounds) that a assault guy could normally take. Demolitions guy is heavily armored but is slower than the rest, he is a good choice if you are using the shotgun. As for guns... as I said go with the CAR-15 or M-16A2, in the handgun department go with the HK .45 Mark23 it packs the most punch. In the accessories Dept. You MUST use the heartbeat sensor for finding those around the corner guys so that’s a must, Then for the other slot choose either Frag grenades or another primary mag. Now you are all set to kick some ass.
Shooting: Best weapons are the CAR-15 and M-16A2 the others are alright but more suited for single player. Make sure to use M-16A2 set at single fire if you plan on sniping a lot, or for all round purpose the 3 shot bursts keep you from running out of ammo while pumping your enemies with a hefty amount of lead. For truly adventurous try using the shotgun on the indoor levels it works fairly well at close combat. When sniping try and find a spot that is safe from people shooting you out of your field of vision, where possible crouch for a much more accurate shot. If it seems both teams are just sniping away get some people to edge up to corners and throw frag grenades in the enemies general direction, this usually gets things moving. Note: DO NOT throw frag grenades with less than half power because then you risk wounding or killing yourself.
Movement: Fast feet is essential to staying alive. Your don’t wanna be caught in the open a lot so running is a must but if you encounter enemies while running your bullets are gonna go 10 ways till Tuesday. I suggest running in the open and down hallways but as soon as you should reach a door/corner/window instantly let go of run then your aiming cursor quickly goes back into normal position so you have greater control as you pick off the tango coming in the door. When moving with you team if you aren’t point man hang back a bit and watch their backs, no sense all running into a door only to get your team blown away 1 after the other. Also as your team is moving and your in back scour the area for lone gunmen... you never know when a guy will take you from behind. If you are point man make sure to use the strafe around corners so you have a better chance at shooting enemies first if they are there. Its also a good idea to use the heartbeat sensor when approaching suspicious areas.
Lastly... know your way around play the all the maps whether in single or co-op or team but once you know where the starting positions are it allows you to get a prime spot early on to pick off the scum.
Primary Weapons
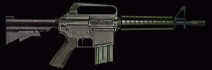 CAR-15: A high
velocity rifle which uses 5.56mm bullets. Same amount of penertration as the M-16A2, but
the target reticle focuses faster. Works very nice when sniping in indoor settings such as
the Skyscraper level.
CAR-15: A high
velocity rifle which uses 5.56mm bullets. Same amount of penertration as the M-16A2, but
the target reticle focuses faster. Works very nice when sniping in indoor settings such as
the Skyscraper level.
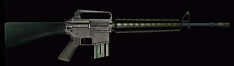 M-16A2: High
velocity rifle, used primarily for outdoor operations. Great sniping weapon because of the
superior zoom level and excellent armour penetration. The most accuracy will be attained
with this weapon when you are crouching using single bullet bursts. In close combat
situations the use of 3 shot bursts will give an excellent amount of damage to ammo used.
It also allows for greater accuracy than full auto will.
M-16A2: High
velocity rifle, used primarily for outdoor operations. Great sniping weapon because of the
superior zoom level and excellent armour penetration. The most accuracy will be attained
with this weapon when you are crouching using single bullet bursts. In close combat
situations the use of 3 shot bursts will give an excellent amount of damage to ammo used.
It also allows for greater accuracy than full auto will.
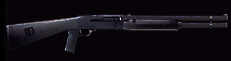 Benelli M1 Tactical 12-Guage: Close combat weapon at its
best. Slow reload, and a low shell capacity are negatives for the shotgun, but the ability
to take down anyone in 1 shot within a couple of metres is a major plus. Also great for
blowing open locked doors. Ineffective from long range, so don't use it if you like
sniping. Best used as a support fire weapon, and as the weapon for any team member taking
the "point" position. Duke's favorite way of taking names and kicking ass.
Benelli M1 Tactical 12-Guage: Close combat weapon at its
best. Slow reload, and a low shell capacity are negatives for the shotgun, but the ability
to take down anyone in 1 shot within a couple of metres is a major plus. Also great for
blowing open locked doors. Ineffective from long range, so don't use it if you like
sniping. Best used as a support fire weapon, and as the weapon for any team member taking
the "point" position. Duke's favorite way of taking names and kicking ass.
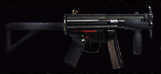
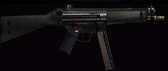 HK MP5-A2: The
steadiest of the weapons. Works very well indoors thank to its great reload and more
accurate fire. Works decently outdoors, but it only has a medium range zoom so the M-16 or
CAR-15 would be better ideas for sniping maps. You have to be good at aiming and hope that
lag doesn't eat you alive with this gun because it lacks the necessary power to breach the
chest armour, so you must aim for either the head or the legs.
HK MP5-A2: The
steadiest of the weapons. Works very well indoors thank to its great reload and more
accurate fire. Works decently outdoors, but it only has a medium range zoom so the M-16 or
CAR-15 would be better ideas for sniping maps. You have to be good at aiming and hope that
lag doesn't eat you alive with this gun because it lacks the necessary power to breach the
chest armour, so you must aim for either the head or the legs.
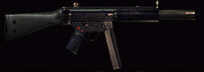 HK MP5SD5:
Shhh..... I can't hear if I'm firing or not. This is the quietest gun of them all. The
faintness of its shots make it extremely hard to locate the source and since it is muzzled
it has the lowest flash of any gun while firing. That makes it extremely valuable if you
don't want to "lite it up" and, unless you want to attract attention, you don't
want to. Unfortunately for this steathiness you will have to trade off some power. It
doesn't fire quite as fast as other MP5's and it doesn't penetrate armour as well. It
won't matter if you can get those extra shots from the dark before the enemy even knows
you are there.
HK MP5SD5:
Shhh..... I can't hear if I'm firing or not. This is the quietest gun of them all. The
faintness of its shots make it extremely hard to locate the source and since it is muzzled
it has the lowest flash of any gun while firing. That makes it extremely valuable if you
don't want to "lite it up" and, unless you want to attract attention, you don't
want to. Unfortunately for this steathiness you will have to trade off some power. It
doesn't fire quite as fast as other MP5's and it doesn't penetrate armour as well. It
won't matter if you can get those extra shots from the dark before the enemy even knows
you are there.
 HK MP5K-PDW:
This gun has the highest rate of fire of any of them. With this ability you can put more
bullets into an enemy than they can. Hell, you can unload an entire clip before they hear
that you are firing. Unfortunately to use this weapon to its max potential you need to
have it on full auto, and without a steady hand with very little lag. Without this your
bullets are truly gonna go 10 ways till Tuesday. You will also be needing to reload alot,
so you might want to skip out on one of your accessories for primary mags. Only use this
weapon indoors because it is very inaccurate and is on par with the Tactical 12-Guage for
sniping purposes. This weapon is extreme amounts of fun with enough practice, but be
warned it is a specialized weapon and shouldn't be your default, just a break from the
norm.
HK MP5K-PDW:
This gun has the highest rate of fire of any of them. With this ability you can put more
bullets into an enemy than they can. Hell, you can unload an entire clip before they hear
that you are firing. Unfortunately to use this weapon to its max potential you need to
have it on full auto, and without a steady hand with very little lag. Without this your
bullets are truly gonna go 10 ways till Tuesday. You will also be needing to reload alot,
so you might want to skip out on one of your accessories for primary mags. Only use this
weapon indoors because it is very inaccurate and is on par with the Tactical 12-Guage for
sniping purposes. This weapon is extreme amounts of fun with enough practice, but be
warned it is a specialized weapon and shouldn't be your default, just a break from the
norm.
Secondary Weapons
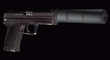
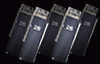
 HK .45 Mark23: Maximum
penetration from such a small little package. Usually our choice for sheer fire power.
HK .45 Mark23: Maximum
penetration from such a small little package. Usually our choice for sheer fire power.
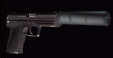
 HK .45 Mark23-SD:
Same as above, except that it is supressed and therefore is quieter for a tradeoff in
power. Doesn't penetrate as well, but is the best penetration of any supressed secondary
weapon.
HK .45 Mark23-SD:
Same as above, except that it is supressed and therefore is quieter for a tradeoff in
power. Doesn't penetrate as well, but is the best penetration of any supressed secondary
weapon.
 Beretta 9mm 92FS:
A faster rate of fire with more shots in the clip than the .45 but it doesn't have the
same amount of penetration. Reliable choice if you like fast firing, also a good choice
for "handgun only" games.
Beretta 9mm 92FS:
A faster rate of fire with more shots in the clip than the .45 but it doesn't have the
same amount of penetration. Reliable choice if you like fast firing, also a good choice
for "handgun only" games.
 Beretta 9mm 92FS-SD:
The supressed version of the above. Quieter with a trade off in penetration.
Beretta 9mm 92FS-SD:
The supressed version of the above. Quieter with a trade off in penetration.
 HK .40 USP: A
nice pistol, but it just doesn't have the penetration the Mark23 does or the reload the
Beretta has. It is nicely situated in the middle of the field taking the best from each,
with small trade offs in each area. This is the weapon for those time you want a change
but don't want to take a big risk by doing so.
HK .40 USP: A
nice pistol, but it just doesn't have the penetration the Mark23 does or the reload the
Beretta has. It is nicely situated in the middle of the field taking the best from each,
with small trade offs in each area. This is the weapon for those time you want a change
but don't want to take a big risk by doing so.
 HK .40 USP-SD:
The supressed version of the above. If you have gotten this far and don't know what
"supressed" means, you need help.
HK .40 USP-SD:
The supressed version of the above. If you have gotten this far and don't know what
"supressed" means, you need help.
Accessories
 Heartbeat Sensor: A
must to find the scum. It is used to detect heart beats of hostiles. One of the best
places to use it is on the stairs because it can detect enemies either on the level above
you or below you. Its one of the items which are almost necessities at the end of games.
Heartbeat Sensor: A
must to find the scum. It is used to detect heart beats of hostiles. One of the best
places to use it is on the stairs because it can detect enemies either on the level above
you or below you. Its one of the items which are almost necessities at the end of games.
 Flashbangs:
These guys blind the enemy for a duration of about 3 seconds. Great for throwing in
doorways before storming the room. If you are storming whip a couple of these into a room
and then have your shotgun totin' point man go in there and kick some ass.
Flashbangs:
These guys blind the enemy for a duration of about 3 seconds. Great for throwing in
doorways before storming the room. If you are storming whip a couple of these into a room
and then have your shotgun totin' point man go in there and kick some ass.
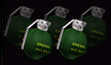 Frag Grenades:
Things that make you go BOOM! Very simply these are grenades which, when they explode, are
effective for about a 10 metre radius. Great for indoor missions because you can bounce
them down the stairs (kind of, they stop once they bounce like 2 or 3 times). If you know
you are going to die and you are fighting in really close combat, drop one at your feet.
You will die, but chances are that you'll take the other guy(s) with you.
Frag Grenades:
Things that make you go BOOM! Very simply these are grenades which, when they explode, are
effective for about a 10 metre radius. Great for indoor missions because you can bounce
them down the stairs (kind of, they stop once they bounce like 2 or 3 times). If you know
you are going to die and you are fighting in really close combat, drop one at your feet.
You will die, but chances are that you'll take the other guy(s) with you.
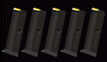
 Primary Mags:
There is really no need to be packing these unless you are using the Tactical 12-Guage or
the MP5K-PDW. If you need these for any of the other weapons just claim that you have a
broken mouse to save yourself from the humilation of admitting that you are a terrible
shot.
Primary Mags:
There is really no need to be packing these unless you are using the Tactical 12-Guage or
the MP5K-PDW. If you need these for any of the other weapons just claim that you have a
broken mouse to save yourself from the humilation of admitting that you are a terrible
shot.
 Secondary Mags:
There really is NO need to carry these unless you plan on having a 15 minute handgun only
game.
Secondary Mags:
There really is NO need to carry these unless you plan on having a 15 minute handgun only
game.
 Door Charges:
They blow doors up! Work great for opening locked doors. Can be used for traps. Just set
one up on a door, get a teammate with a heartbeat sensor near the door to tell you when
the enemy is passing by, and then make it go boom. If you can get the timing right it
works beautifully, if not be prepared for all hell to break loose.
Door Charges:
They blow doors up! Work great for opening locked doors. Can be used for traps. Just set
one up on a door, get a teammate with a heartbeat sensor near the door to tell you when
the enemy is passing by, and then make it go boom. If you can get the timing right it
works beautifully, if not be prepared for all hell to break loose.
 Electronic Kit:
You won't need this unless you are playing the single player missions cooperatively.
Electronic Kit:
You won't need this unless you are playing the single player missions cooperatively.
 Demolitions Kit:
You won't need this either unless it is a coop game.
Demolitions Kit:
You won't need this either unless it is a coop game.
 Lockpick Kit:
It can be used on some multiplayer levels, but usually unnecessary for the amount of locks
you will need to pick.
Lockpick Kit:
It can be used on some multiplayer levels, but usually unnecessary for the amount of locks
you will need to pick.
Character Types
Assault: The default setting, this character has the best accuracy and can withstand a fair amount of damage.
Demolitions: The pyro of the group. He enjoys watching things go boom. He can set breaching charges faster than other characters. These guys can take the largest amount of damage, but make the most amount of noise.
Electronics: The guy who likes tinkering with things. He can pick locks in about 1.5 seconds. These guys can take only a little bit less damage than the Assault character.
Recon: Stealth, stealth, and more stealth. These guys are extremely quiet due to less armour, but due to this they can take the least amount of damage.
Areas of Confrontation
Killhouse 2-Storey: Start off by throwing grenades on to or off of the roof, depending on the team you are on. Once inside the Killhouse secure the stairs and you will win.
Embassy: Lots of locked doors, so you might want to have an Electronics expert or someone with a lockpick kit on them. Any weapon will work on this level, none are seriously disadvantaged here. Be prepared for lots of combat in the hallways and in the main foyer.
Congo Mansion: You HAVE to have either the CAR-15 or M-16A2 for this mission due to the sniping which will occur. Get inside the house as soon as possible or else it will become difficult because of the many sniping positions the team starting in the house has. Use night vision in this mission.
Oil Rig: A big, VERY big level. Hunt in pairs, patrolling near the stairwells. For an added challenge get a shotgun and go "Stormin' Norman" (see the Duke Multiplayer Strategies for explanation) in this level. Stay in the enclosed areas and stay off the catwalks if you plan on using this tactic.
Hacienda: Simply if you are the assaulting team you don't stand a chance if you can't get in the main gates extremely quickly. If you can get in there it will become a brawl, if you don't the snipers in the patio closest to the gate will have a field day.
Water Ride: STAY THE HELL OUTTA THE WATER!! The water not only slows you down it makes extra noise which gives away your position to the snipers on the upper level and when that happens you are fucked. Pretty much get up onto the catwalks as soon as possible and keep your eyes and ears open since this is a very open level. The control towers should be checked often as they make good shooting platforms and are hard to check with the Heartbeat Sensor.
Dam: A very open level. Slowly go through the level watching your ass. Pairs work well here again. Use the CAR-15 or M-16A2 here because you aren't gonna have many close to medium range encounters here.
Bio Lab: This level is grenade heaven. Main goal here is to secure the 2 entrances to the main building. Both teams start outside, so if you want to be daring haul ass to the other team starting postition and unleash with either a shotgun or Frag Grenades. If they see you first though you aren't gonna make it far.
Airport: Snipe, snipe, snipe, snipe! That is all this level is, the 2 teams will snipe from either the doorways or from the ground to the control tower. You need an M-16A2 or CAR-15 for this level, any other weapon just won't cut it. Crossing the runway is extremely treacherous and isn't advised. The only way to really do it is with cover fire and hauling ass down one of the sides. Even then you gotta be damn lucky.
Mint: The key to this level is the stair to track the enemy with the Heartbeat Sensor. Expect many battles in the jail barred hallways and in the press room. MP5's work well on this level since much of the combat is relatively close. Also go outside to flank the enemy through the loading dock room.
Ship: Get up the ladder onto the main level of the ship. If you don't the team on top will just continually throw grenades down and you are fucked until either they come down or run out of grenades or you die. Once above it is just who can fire first and most accurately. Remember you can climb on top of the crates to get a jump on the enemy.
Estate: Lots of sniping here. When you are outside it is advisable to use your night vision goggles. Try to get into the house as fast as possible. The team which starts in the house must secure the garage and the rear windows. If they do this they can easily pick off the enemy team as they run for the house.
Skyscraper: Most combat is going to occur in the main open foyer area again here. Door traps with breaching charges work well here because the hallways are narrow and you gotta run by some doors. MP5's work well in this level along with the CAR-15.
Road Ambush: A sniper's stalemate. The gold team will snipe from on the bridge and the blue team will station themselves by the semitrailer truck. It will remain a stalemate until one team gets bored and rushes the opposing team, where they will most likey get sniped. Use the M-16A2 with single shot for maximum accuracy and range.
Athlete's Village: Another grenading map. Pretty wide open here. If you can travel in packs, do so. Get control of the middle hallways and it will be easier to find out where the enemy is and to move to intercept them.
Bio Dome: Stay in small packs of 2 or 3. This will allow you to keep an eye on each other's backs. Locate the enemy quickly and strike quickly. If you want to stay alive stay out of the main dome area. The largest and most complex level of Rainbow 6, so you can get spread out easily and ambushed even easier.
Cheats
1-900 :Exaggerated breathing effect
5fingerdiscount :Restores full ammo
avatargod :Makes your player invincible
teamgod :Makes your entire team invincible
bignoggin :Big head mode
meganoggin :Extralarge mode
Explore :Toggles victory conditions on/off
No-brainer :Toggles enemy AI on/off
Silentbutdeadly :Makes you fart while moving
Turnpunchkick :Turns characters into two-dimensional figures